Summary
alugha lets you record your own voice straight into the dubbr. Segment by segment, no separate audio tool required. This article shows where the Recording Panel lives, how to pick your microphone, and how to record, replace, or import audio on any segment.
Where recording lives
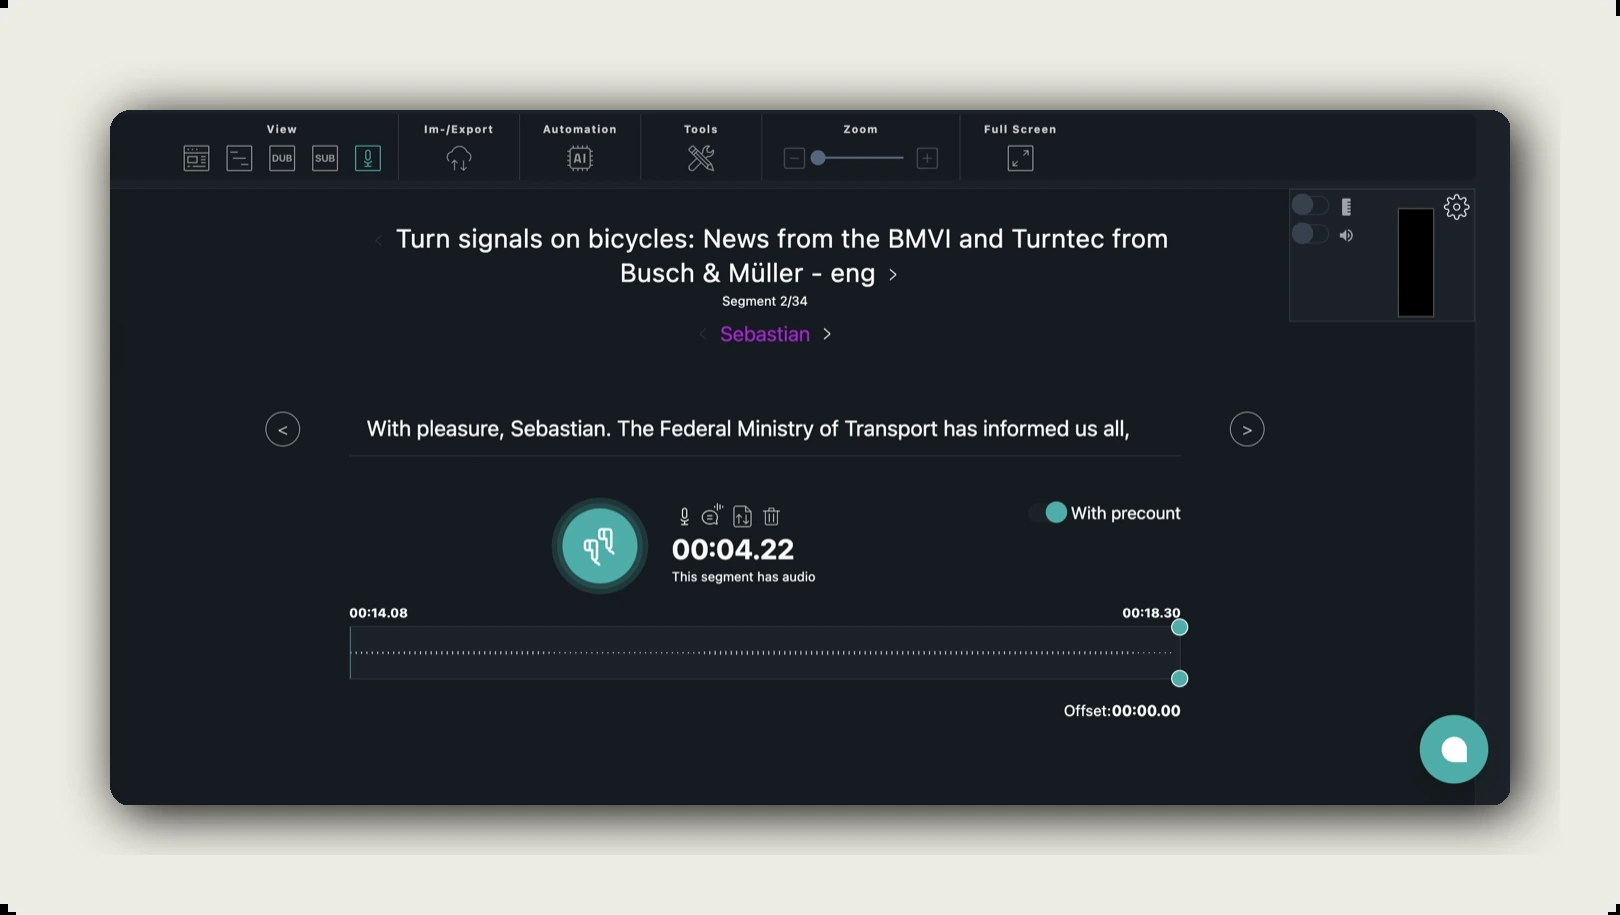
Recording is not in the Tools menu. It lives in the Recording Panel at the top-right of the dubbr, above the player area. The panel is always visible while you edit.
Inside the panel you see:
- Level-meter toggle (ruler icon). Turns the live dB meter on.
- Audio-monitoring toggle (speaker icon). Play what the microphone hears back through your headphones.
- Live dB meter. Numeric reading plus a vertical scale from -60 dB up to -6 dB. Stay in the green; spikes into the top zone clip.
- Mini preview, a tiny screen showing the active recording device’s state.
- Gear icon. Opens the Recording Settings popover (device, gain, scan).
If the meter shows no signal when you speak, the microphone is muted at the OS level or the wrong device is selected. Open Recording Settings to pick a different one.
Recording Settings
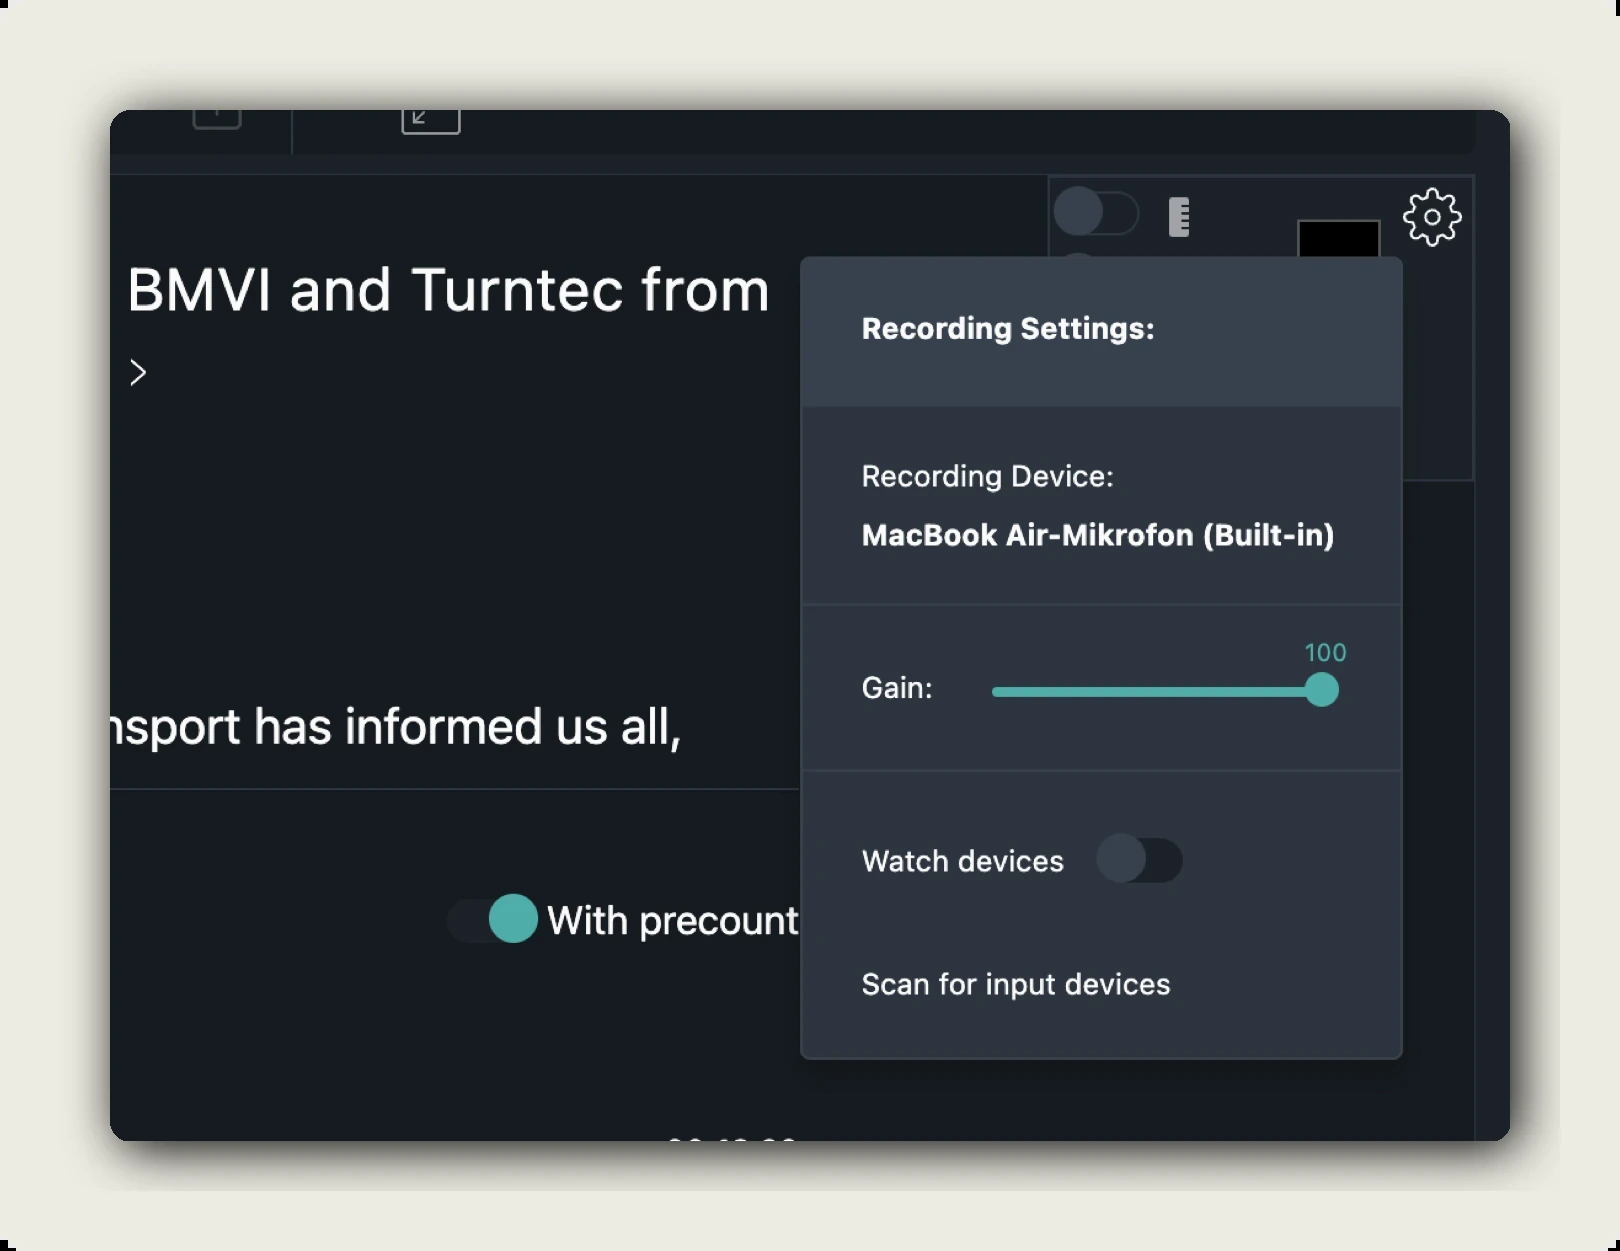
Click the gear icon in the Recording Panel. The Recording Settings popover has four controls:
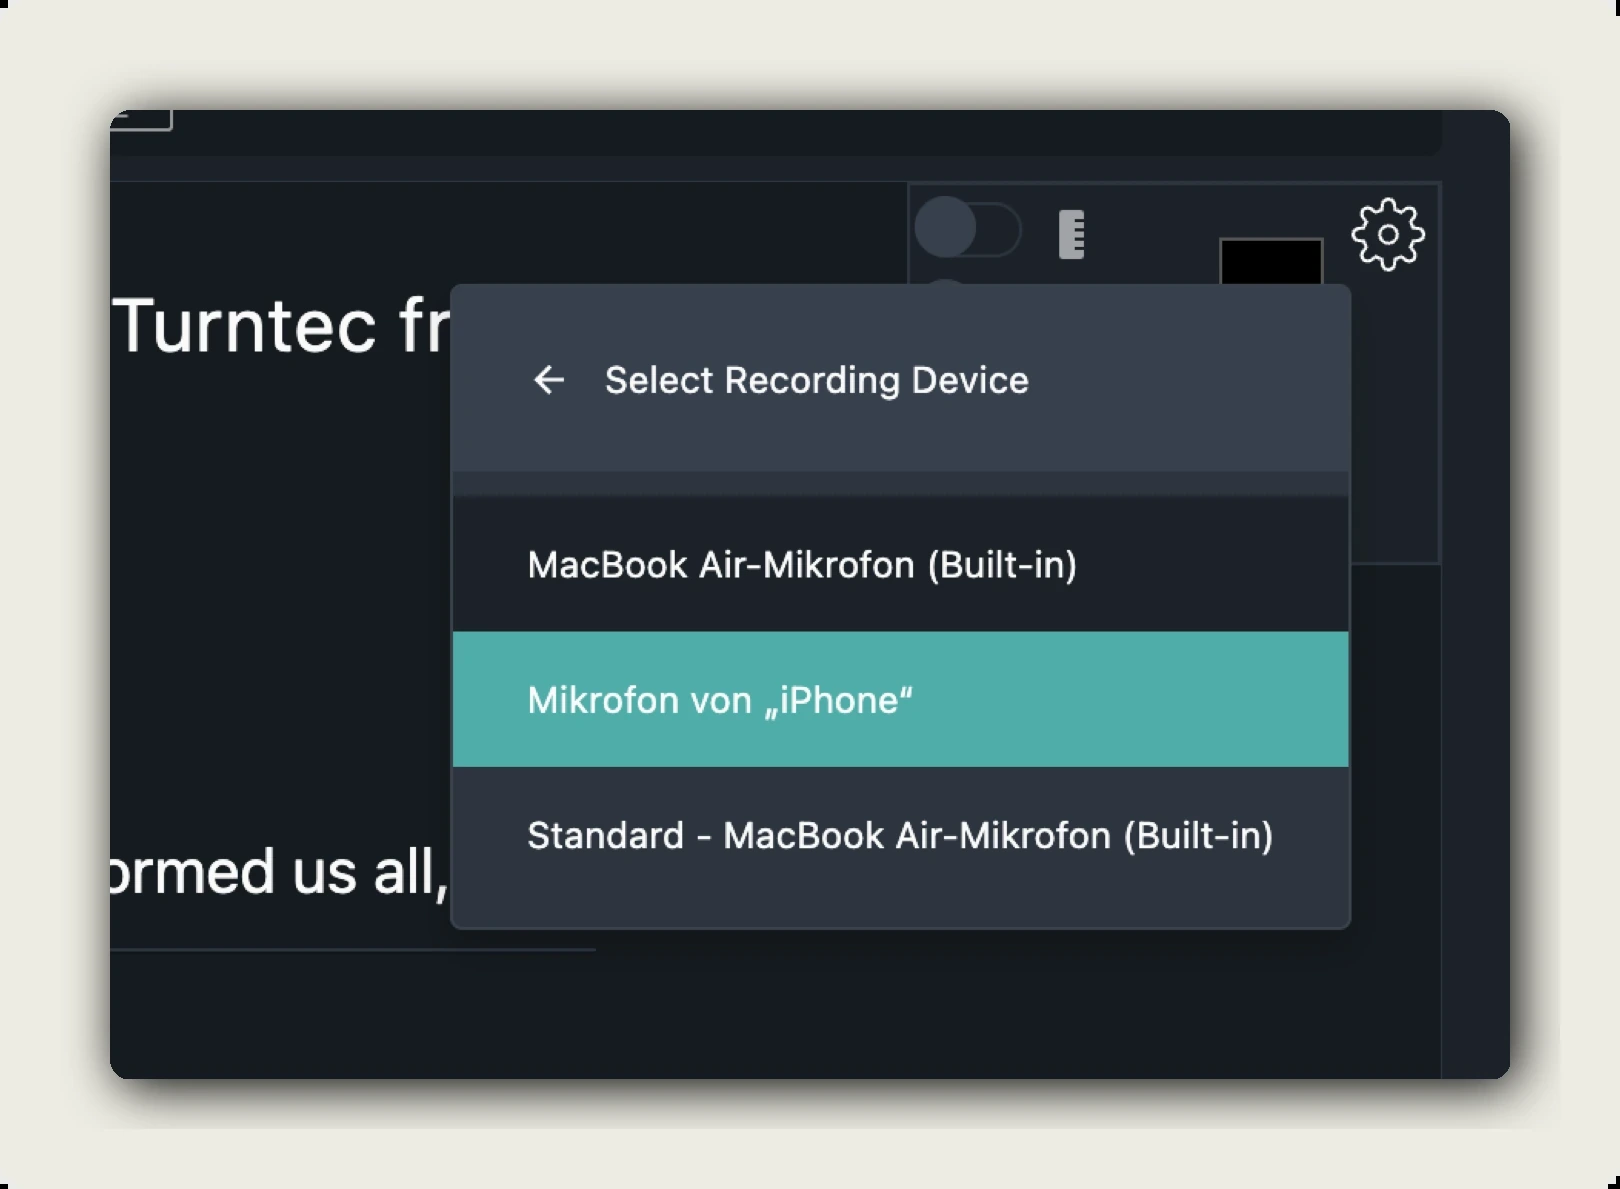
- Recording Device, the current input. Click it to open a list of every microphone alugha sees (built-in mic, USB mic, iPhone Continuity microphone, etc.). The active device is highlighted teal.
- Gain, a 0–100 slider that boosts or attenuates the input signal. Default 100. Drop it if you keep clipping.
- Watch devices. Toggle. When on, the device list refreshes automatically the moment you plug in a new microphone.
- Scan for input devices. Manual refresh. Use this if you just connected a device and it’s not showing up yet.
macOS may ask for microphone permission the first time you record. Allow it for alugha.com in System Settings → Privacy & Security → Microphone.
The per-segment recording controls
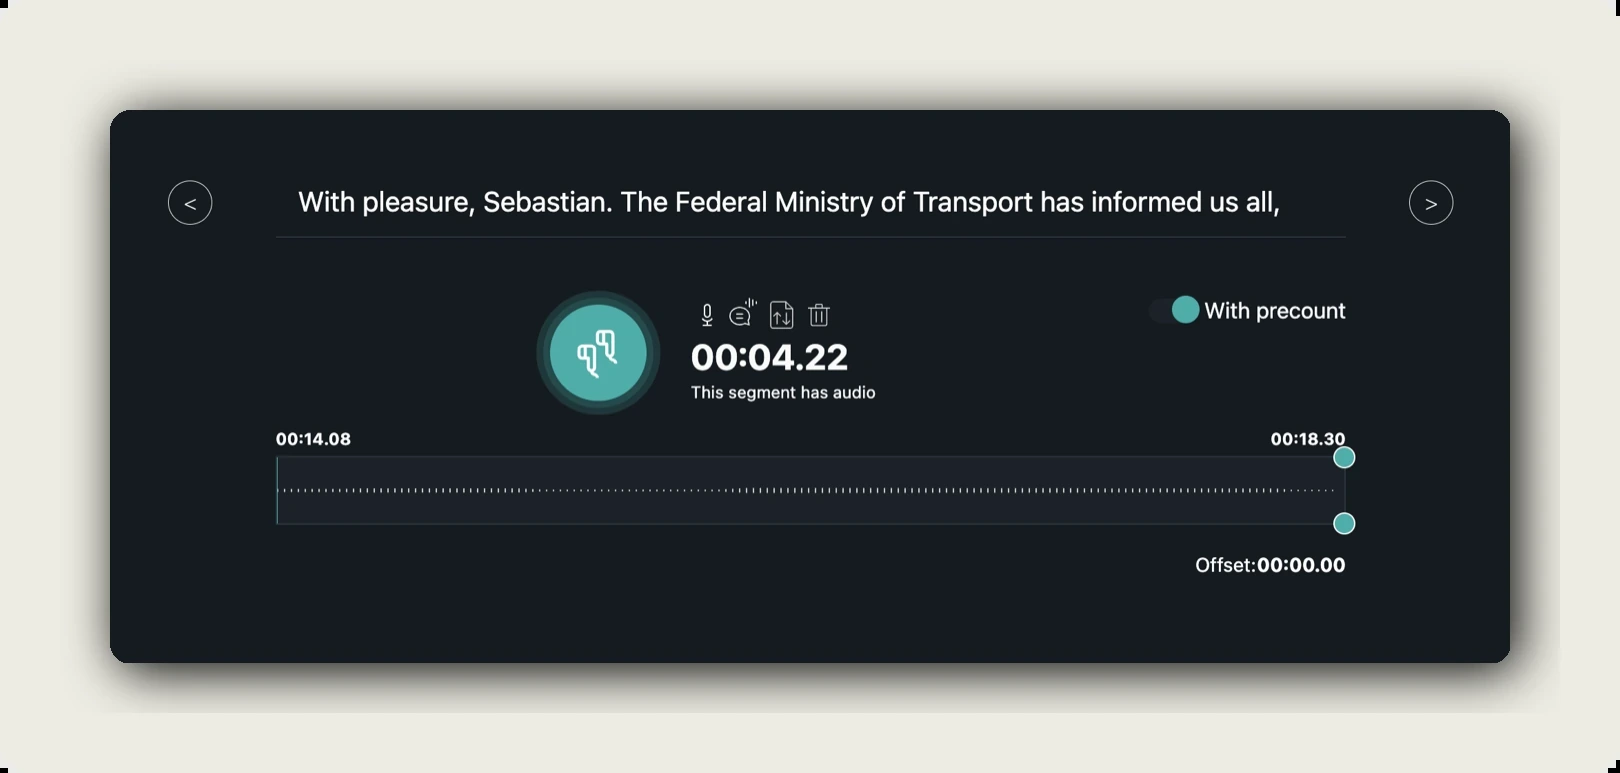
Open any video in the dubbr (View channel → EDIT), switch to the language you want to record on, and click a segment in the left list. The middle column now shows the segment’s recording controls.
The big teal headphone button plays back whatever audio that segment already has. Around it sit four small icons:
- Microphone icon — Record a new version. Starts a recording bounded by the segment’s timecodes.
- Speech-bubble icon. Generates a TTS replacement for this single segment. Opens the TEXT TO SPEECH dialog with a voice picker, plays a preview, and shows the credit cost (typically 2 credits).
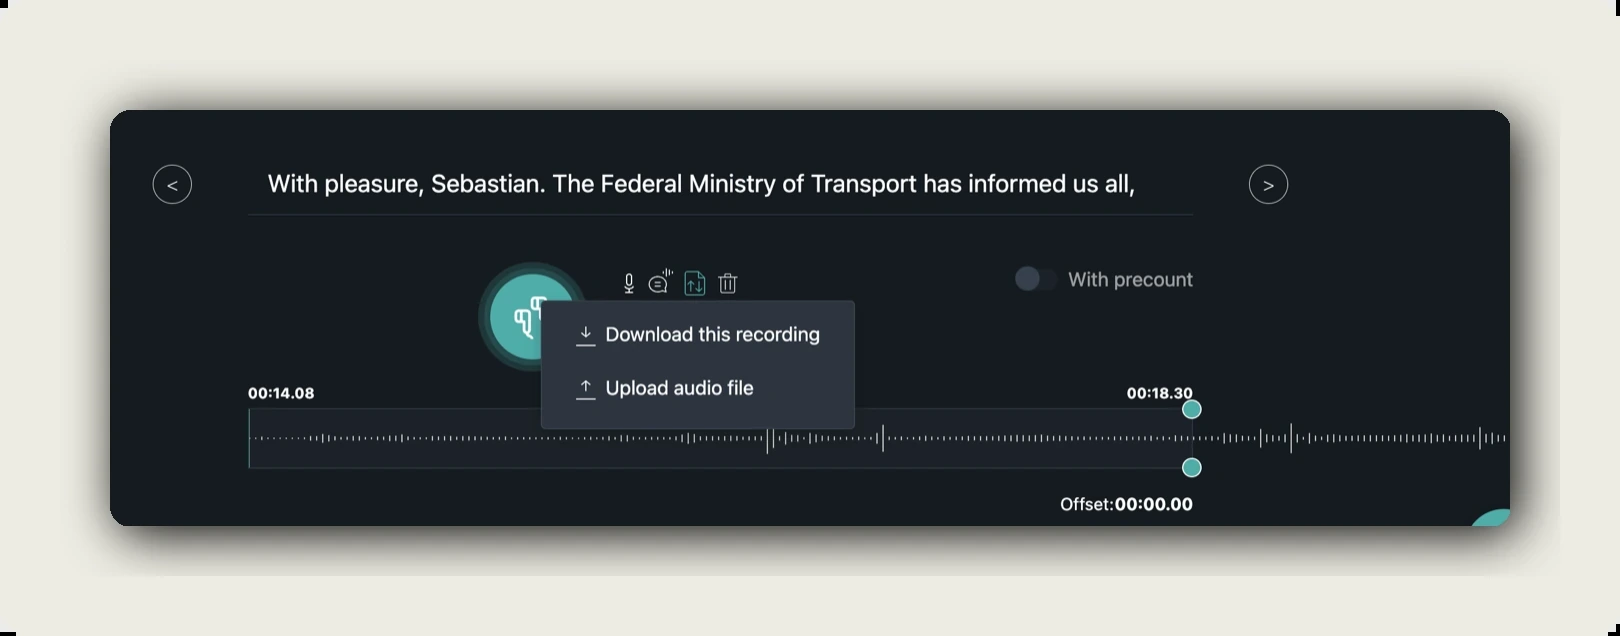
- Up-arrow icon. Opens a small menu with Download this recording and Upload audio file. Use Upload to swap in audio you recorded outside alugha.
- Trash icon. Deletes this segment’s audio without touching the transcript.
To the right is the With precount toggle. When on, you get a short audible countdown before recording starts so you don’t clip the first syllable.
Recording a segment, step by step
1. Pick a microphone
Open Recording Settings via the gear icon, click Recording Device, pick the input you want, close the popover. Toggle the level meter on and say a sentence at normal volume. You should peak around -12 to -6 dB in the green zone.
2. Select the segment
Click the segment in the left list. The middle column shows the segment’s timecodes (e.g. 00:14.08 → 00:18.30) above the range bar. The transcript text for that segment appears above the controls so you have a script while recording.
3. Optional: enable precount
Flip With precount on if you need a beat before speaking. Keep it off if you’re re-recording a small fix and want to start instantly.
4. Hit Record
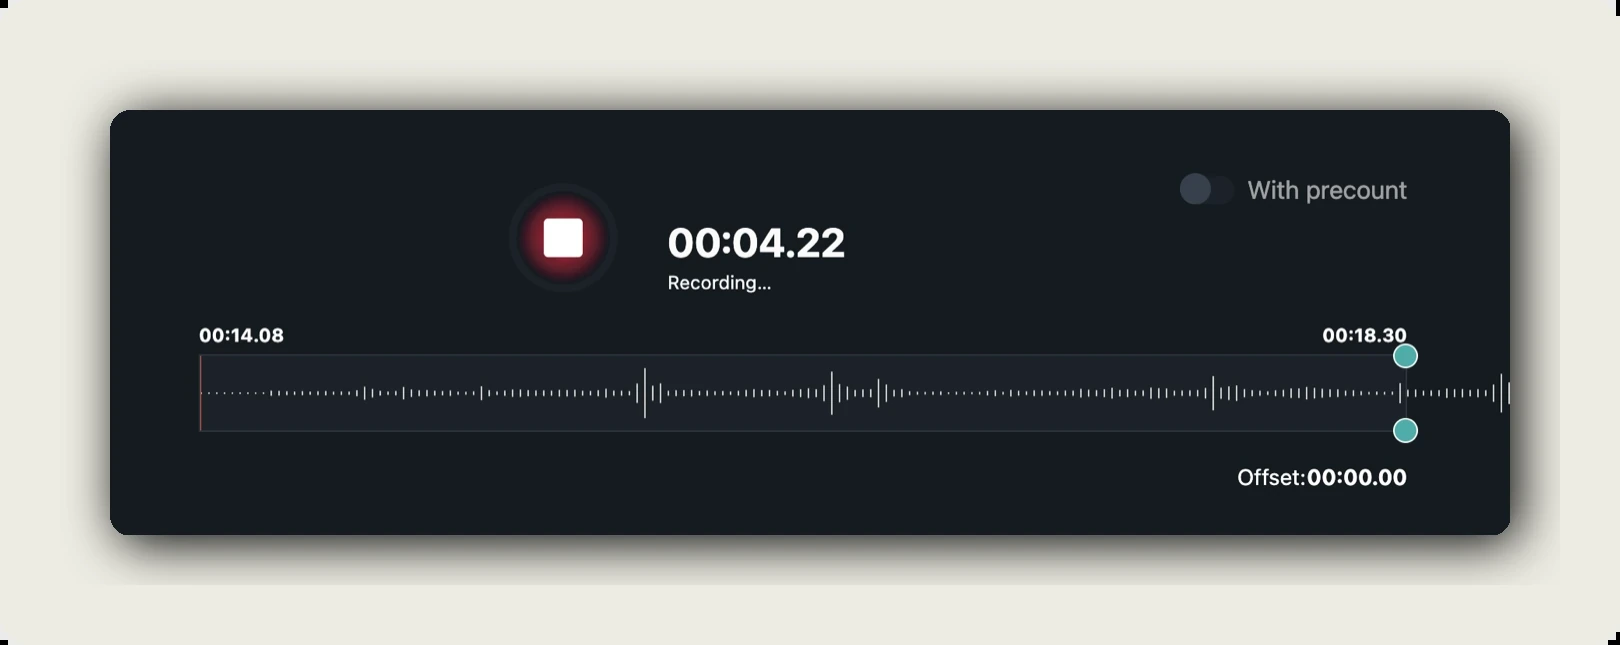
Click the microphone icon. The big teal button turns red with a square stop button, the timer counts up, and the range bar fills with a live waveform as you speak. The recording stops automatically at the end of the segment, or click the red square to stop early.
5. Listen back
After the stop, the big teal headphone button comes back. Click it to listen. The label below the timer changes to This segment has audio.
6. Re-record or adjust
Not happy? Click the microphone icon again, the new take replaces the old one. To delete without replacing, use the trash icon.
Importing audio you recorded outside alugha
Already have a recording from your DAW, Zoom call, or field recorder? You don’t need to re-do it inside alugha:
- Select the segment.
- Click the up-arrow icon.
- Choose Upload audio file.
- Pick a file from disk. Supported formats: WAV, MP3, M4A, OGG.
For bulk audio swaps (whole language at once instead of segment-by-segment) use Im-/Export → Import Voice Audio from the toolbar. See How to manage audio.
Fixing timing with offset
Recordings sometimes land a fraction of a second too late or too early against the source video. The right-end handle of the segment’s range bar has a secondary offset handle you can drag up or down.
Below the bar you see Offset: 00:00.83 (your value) and a Reset link. Positive offset pushes the audio later; negative pushes it earlier. Click Reset to clear and start over.
Mixing recording with TTS and original audio
On any language track you can mix all three audio sources per segment:
- Recorded audio. What you record with the microphone icon.
- TTS audio. Generated via the speech-bubble icon (per-segment) or Automation → Text To Speech (whole language).
- Imported audio. Uploaded via the up-arrow icon or via Im-/Export.
A common workflow: generate TTS for the whole language first, then re-record only the segments where the TTS sounds off. Product names, jargon, brand pronunciations. Recording one segment replaces just that segment’s audio; the rest stays TTS.
Tips for clean recordings
- Watch the meter, not your ears. Peaks above -6 dB clip; aim for the -12 to -6 dB green zone.
- Use a USB or XLR mic. Laptop built-in microphones pick up keyboard noise and room reflections.
- Headphones, not speakers. Speakers cause the source video to bleed into your recording.
- One quiet take per segment beats a long take you have to chop. Use the segment list to navigate.
- Re-record short, surgical fixes. Long re-records break the timing of surrounding segments.
- Save the audio file from Upload audio file as backup. Use Download this recording before you re-record over a take you might want back.
Troubleshooting
The microphone shows no signal:
- Open Recording Settings, click Recording Device, confirm the right input is highlighted.
- Click Scan for input devices in case the mic was plugged in after the dubbr opened.
- Check OS-level permission: System Settings → Privacy & Security → Microphone (macOS) or Settings → Privacy → Microphone (Windows).
- Try another browser tab, if no app can see the mic, restart the browser.
The recording sounds distorted or clipped:
- Open Recording Settings and lower the Gain slider.
- Move further from the microphone. Close-mic plosives clip even at low gain.
Recording cuts off before I finish speaking:
- The recording stops automatically at the segment’s end timecode. Either trim what you say, or extend the segment with Tools → Extend Segments.
The audio is offset from the video:
- Drag the secondary handle on the right end of the range bar to add positive or negative offset, watch the Offset value below, click Reset to undo.
Where to go next
- How to manage audio. Voices, Im-/Export, per-language bulk imports.
- How to manage language tracks. Add, delete, switch language tracks.
- Generate AI voiceover with Text-To-Speech, the bulk-TTS workflow.
- Navigating through AI features
- dubbr 101
Was this article helpful?