Summary
Audio in alugha is organised around voices. Every speaker in your video gets a voice slot, every language reuses those slots, and you can import or export audio in bulk via the Im-/Export menu. This article shows the Voices section, the per-voice options, and the bulk Import/Export Voice Audio workflows.
The Voices section
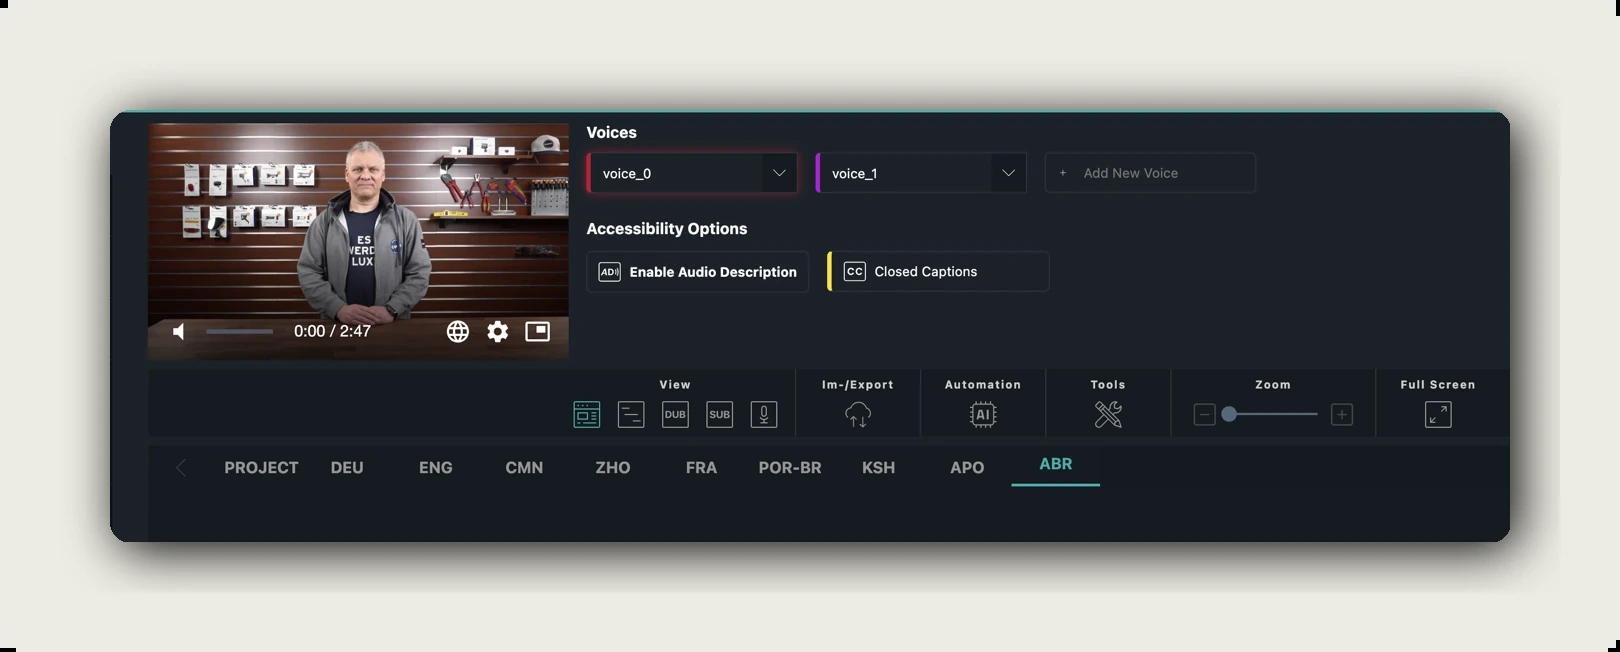
Open a video in the dubbr (View channel → EDIT). At the top of the editor, next to the player, you see Voices with two slots side by side and a + Add New Voice button.
Each slot represents one speaker in your video. By default new projects start with voice_0 and voice_1 (pink and purple accents). Rename them to your real speakers (e.g. Manfred, Sebastian) and the new names show up everywhere a voice is referenced: segment headers, TTS dialog, Import/Export dropdowns.
Per-voice options
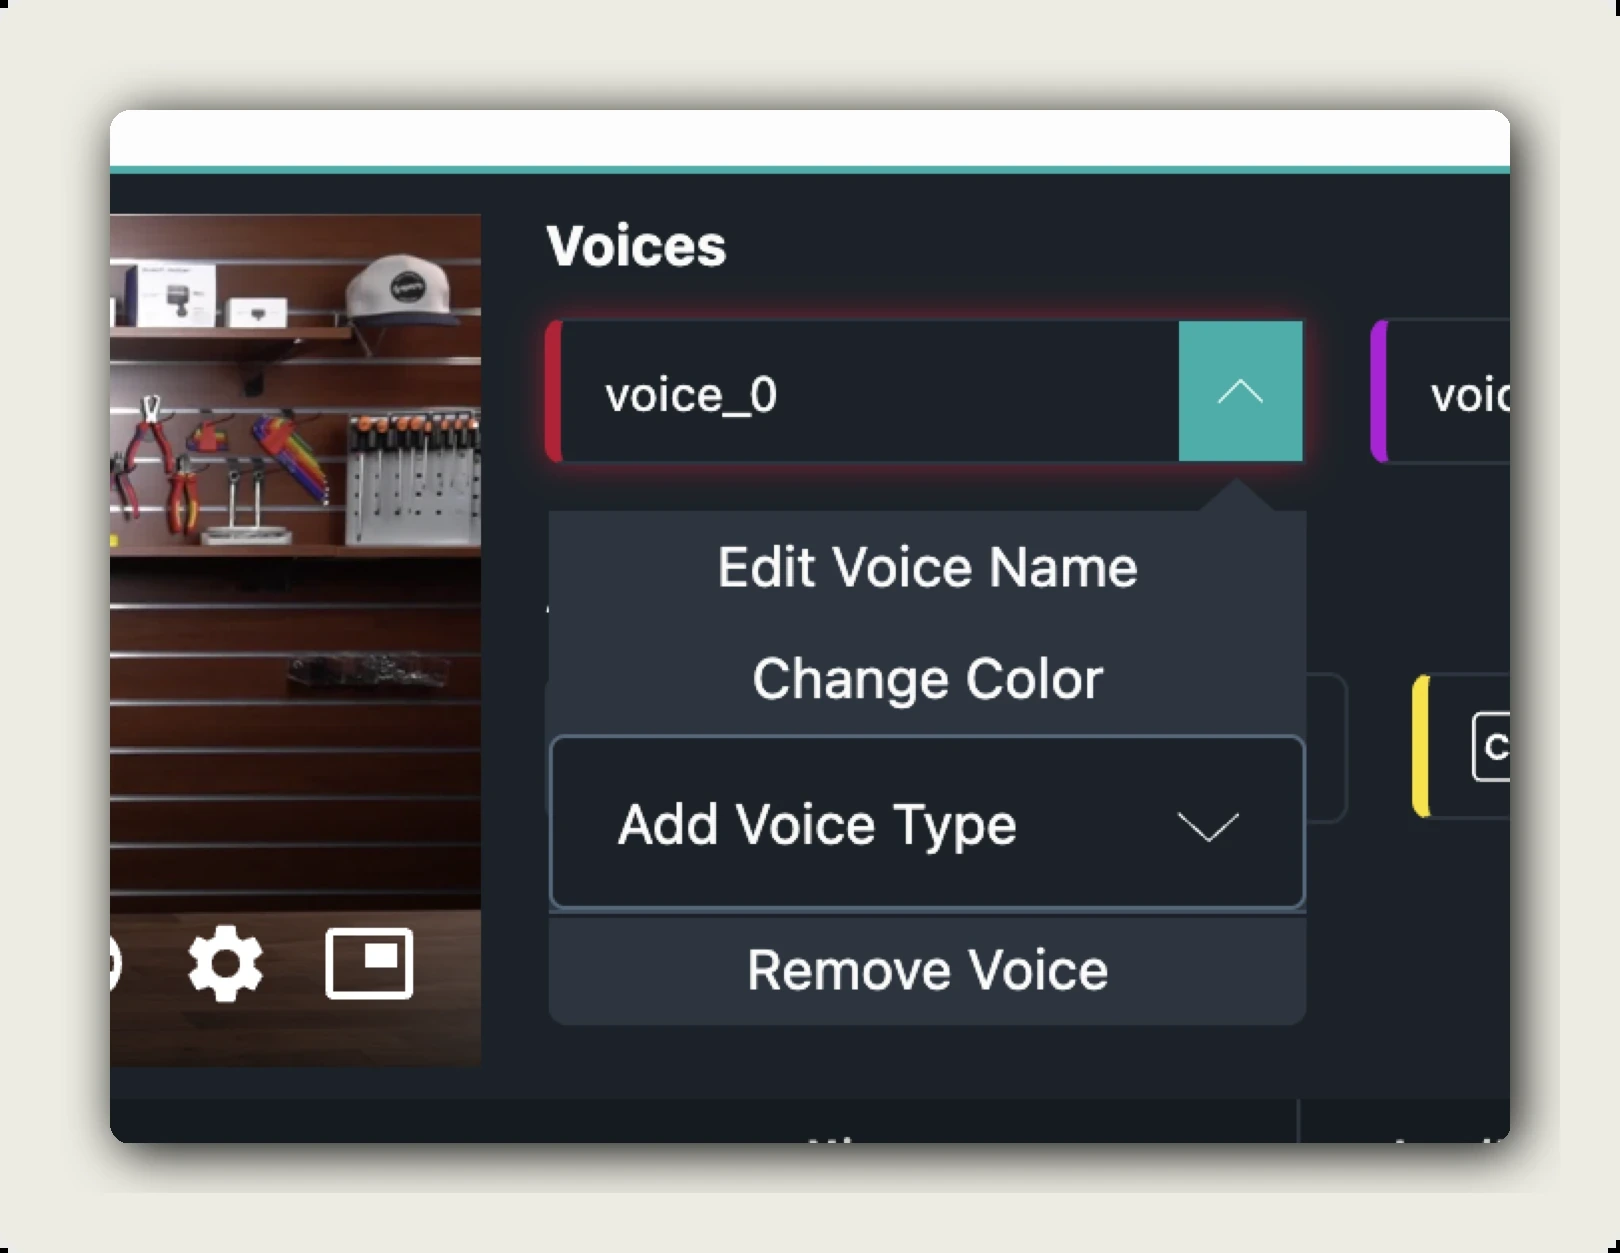
Click the caret on a voice slot to open its menu:
- Edit Voice Name. Rename the slot. Use the actual speaker name; it propagates across all language tabs.
- Change Color. Pick the accent colour. Used to colour-code the speaker in WebVTT exports and segment list.
- Add Voice Type. Tag the speaker (e.g. narrator, character, side speaker). Used by the TTS engine to pick fitting AI voices.
- Remove Voice. Deletes the slot and unassigns all its segments. Use with care; the segments stay but lose their voice mapping.
To add a third or fourth speaker, click + Add New Voice. There is no hard upper limit on voices per project, but two to four is typical for an interview, four to eight for a panel.
How voices interact with languages
Voices are project-wide, not per-language. If you set up Manfred and Sebastian on the English track and then add a German track, the same two voices appear on the German track. You assign one voice per segment, and Text-To-Speech uses that mapping to pick a matching AI voice per language.
Result: your speaker structure is set once and reused across every language. No per-language re-mapping.
Three ways to get audio onto a track
Each language track can be filled with audio in three ways. You can mix them freely. One segment recorded, the next TTS, the next imported.
- Record with the dubbr. Per segment, via the Recording Panel and the per-segment microphone icon. See How to manage recording.
- Generate with AI (TTS). Per segment via the speech-bubble icon, or per whole language via Automation → Text To Speech. See Generate AI voiceover with TTS.
- Import audio you already have. Per segment via the per-segment upload icon, or in bulk via Im-/Export → Import Voice Audio.
Bulk import: Import Voice Audio
Use this when you already have a complete audio file for a language and voice combination (e.g. a finished dub from your studio) and want to drop it onto the whole track at once instead of per segment.
Step 1. Open the dialog
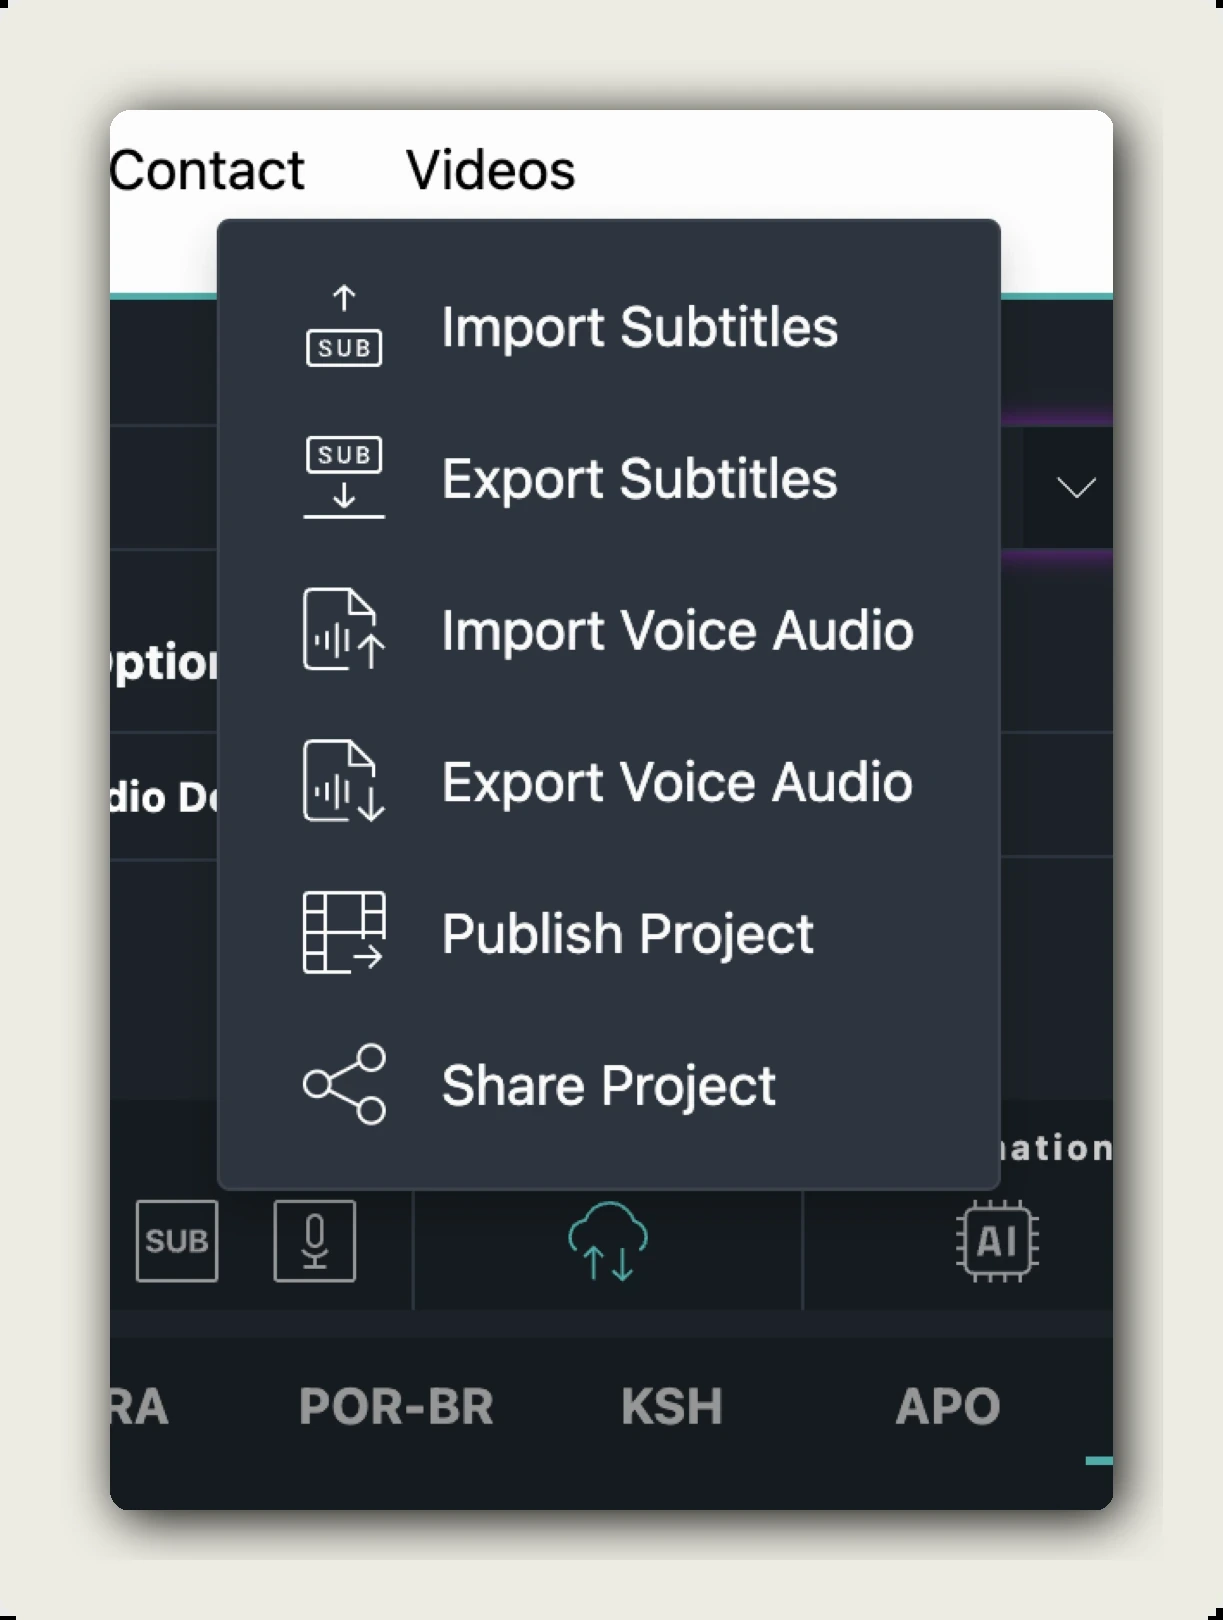
In the dubbr toolbar, click Im-/Export → Import Voice Audio. The IMPORT VOICE AUDIO dialog opens.
Step 2. Upload the file
Click SELECT A FILE TO UPLOAD or drag the file onto the dropzone. Supported formats: WAV, MP3, M4A, OGG.
Step 3. Pick language and voice
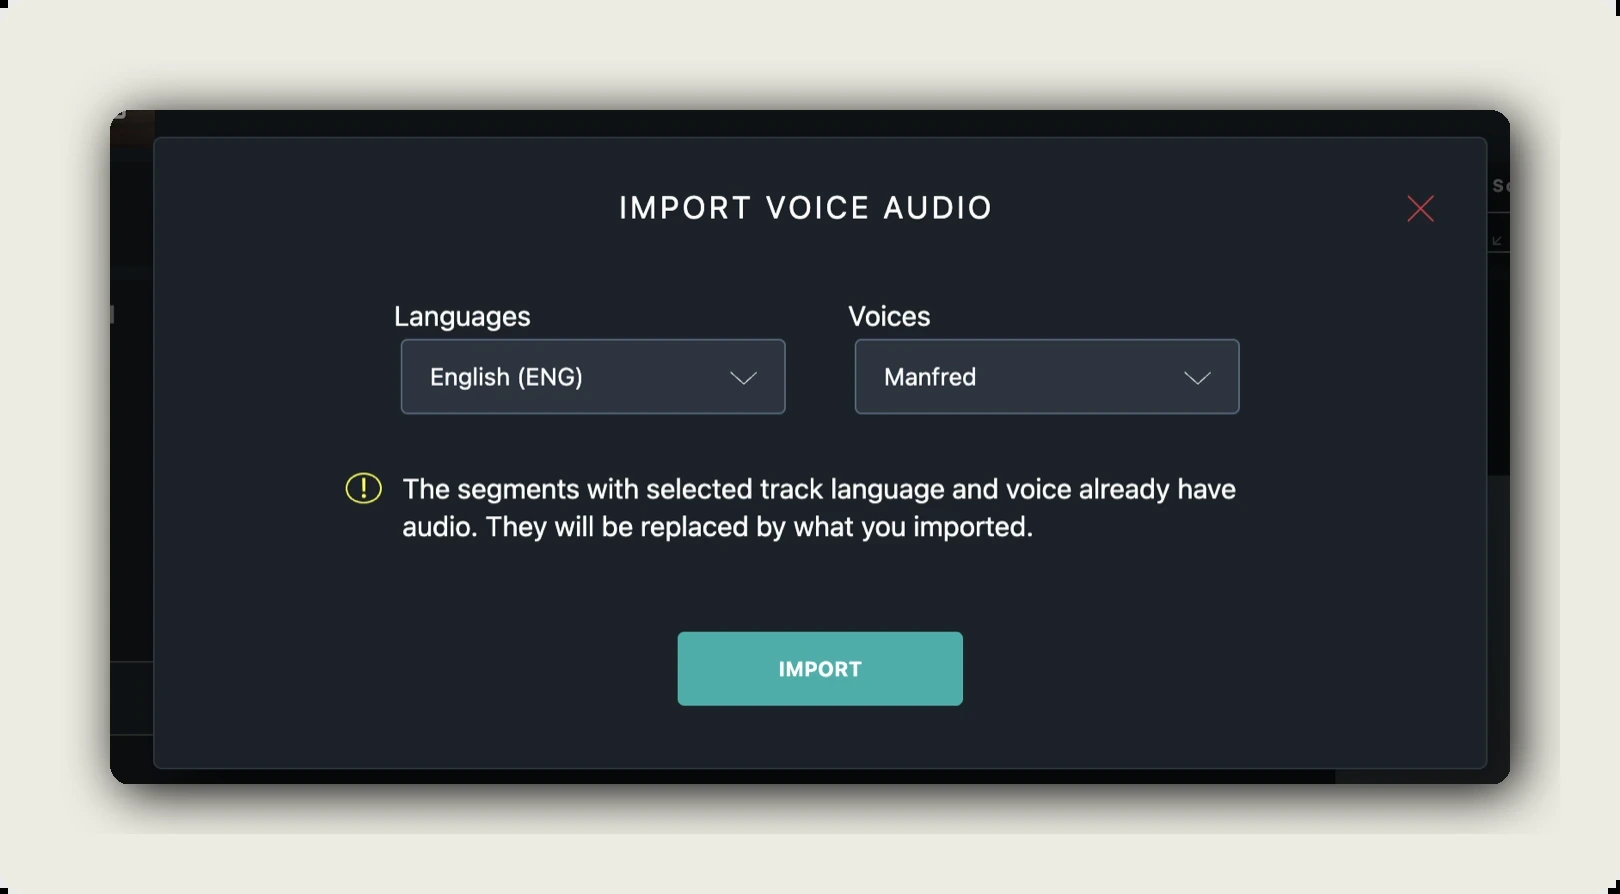
Once the file uploads, two dropdowns appear:
- Languages. Which language track this audio belongs to. Only languages you already have on the project show up.
- Voices. Which voice slot it belongs to (e.g. Manfred or Sebastian).
The IMPORT button stays disabled until both are picked.
Step 4. Confirm overwrite (if applicable)
If the selected language and voice already have audio on some segments, a warning appears: The segments with selected track language and voice already have audio. They will be replaced by what you imported. Click IMPORT to overwrite, or change Voices to a different slot to preserve the existing audio.
Step 5. Wait for processing
Close the dialog. On the PROJECT tab the import appears under Active jobs with a status of processing. When it completes, the status flips to completed and a yellow Reload now button shows at the top. Click it to refresh the editor with the new audio.
Bulk export: Export Voice Audio
Use this when you want to pull out the finished audio for one language and voice (e.g. for podcast distribution, an external editor, or as backup before re-recording).
Step 1. Open the dialog
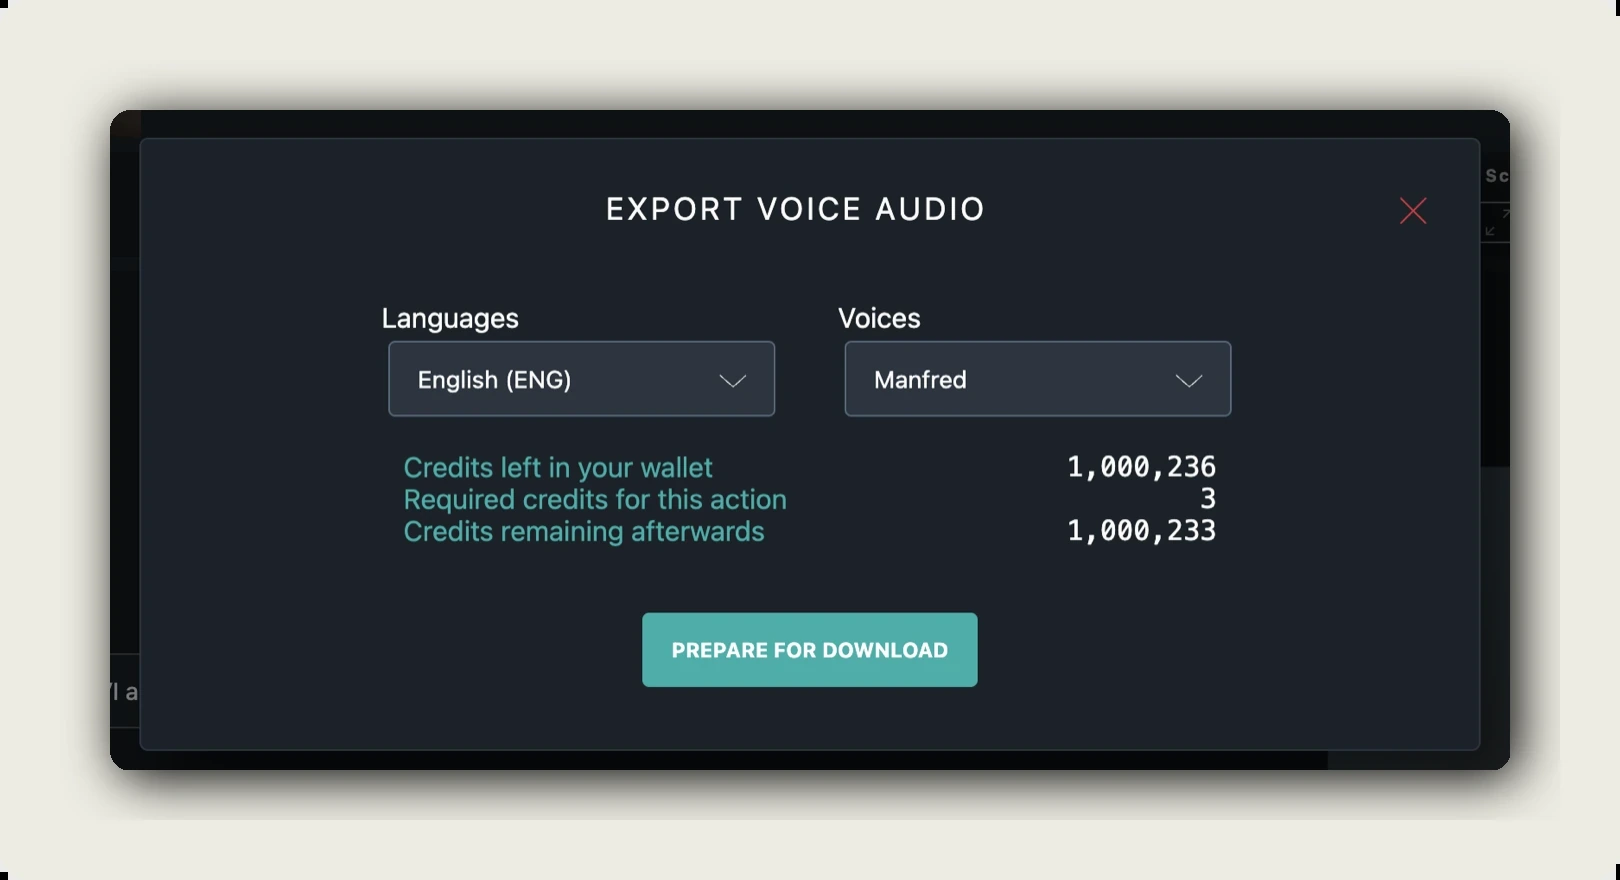
In the toolbar, click Im-/Export → Export Voice Audio (the menu entry shows the tooltip Download the recorded audio file). The EXPORT VOICE AUDIO dialog opens.
Step 2. Pick language and voice
Two dropdowns: Languages and Voices. You export one combination at a time. If you need every voice of every language, run the export several times.
Step 3. Review credits
The dialog shows your three credit numbers:
- Credits left in your wallet
- Required credits for this action. Typically 3 credits per export.
- Credits remaining afterwards
Step 4. Prepare and download
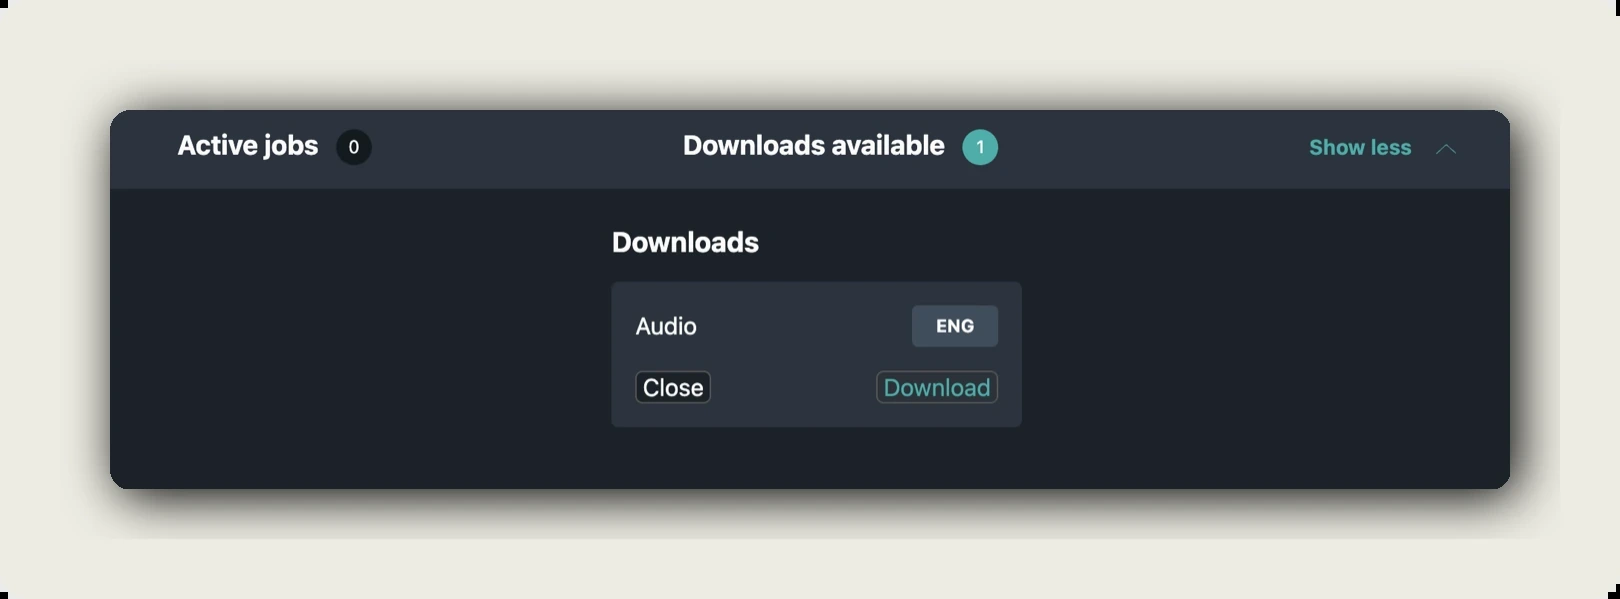
Click PREPARE FOR DOWNLOAD. The job moves to Active jobs on the PROJECT tab with status processing. When ready it flips to the Downloads available panel.
Step 5. Grab the file
Under Downloads available you see a Downloads card with Audio, a language chip (e.g. ENG), and two buttons: Close and Download. Click Download to save the file. Click Close once you have it. Closing removes the entry from the panel.
The exported file is the concatenated, time-aligned audio for the selected language and voice across every segment that voice owns. Ready to use as a single audio track.
A note on Accessibility Options
Right under the Voices section sits Accessibility Options with two toggles: Enable Audio Description and Closed Captions. These add or expose accessibility tracks alongside the dub. They’re not part of bulk audio import/export, but they live in the same area. Flip them on per language as needed. See How to manage subtitles for the captions side.
Audio management tips
- Name your voices early. Renaming voice_0 to Manfred before you start TTS makes every dropdown easier to read across languages.
- Colour-code per speaker, not per language. Same speaker, same colour in every language. Lets WebVTT subtitle colour pass through correctly.
- Pre-export before destructive edits. Run Export Voice Audio for a backup before you re-record or bulk re-translate.
- Match imported file length to segment count. Import Voice Audio splits the file across segments by your existing segment timecodes, a file shorter than the project gets cut at the end.
- Use the Reload now button. After Import Voice Audio completes, the editor still shows the old audio until you click Reload now.
Troubleshooting
The IMPORT button stays disabled:
- Both Languages and Voices must be picked. If the Voices dropdown is empty, the chosen language has no voices yet. Add one in the Voices section first.
- The file may still be uploading. Wait for the dropzone state to clear.
I imported audio but the dubbr still shows the old audio:
- Look for the yellow Reload now banner at the top and click it.
- Check Active jobs on the PROJECT tab, the job may still be processing.
Export shows up in Active jobs but never reaches Downloads available:
- Refresh the editor. Long exports occasionally need a tab reload to surface.
- Confirm you have enough credits. Insufficient credit blocks the export at the start.
The imported audio plays but is misaligned:
- Imported files inherit your existing segment timecodes, if the file was produced against different timecodes, segments will drift. Use the per-segment Upload audio file (under the per-segment up-arrow icon) for a more controlled placement.
Where to go next
- How to manage recording, the per-segment recording workflow.
- Generate AI voiceover with Text-To-Speech
- How to manage language tracks
- How to manage subtitles
- Navigating through AI features
Was this article helpful?