Summary
Download your subtitles in WebVTT, SRT, or plain text to reuse them outside alugha — in another player, on YouTube, in a captions provider, or as a transcript for your team. One dialog, any language, any source track, any format, with an optional colored subtitles styling hint baked in.
Prerequisites
Before you begin:
- At least one track with subtitle or dubbing segments (see Create subtitles from your transcript).
- An idea of which source you want to export — the subtitle track or the dubbing track — and which format your destination accepts.
- No credits required — exports are free.
Step-by-Step Instructions
1. Open Im-/Export → Export Subtitles
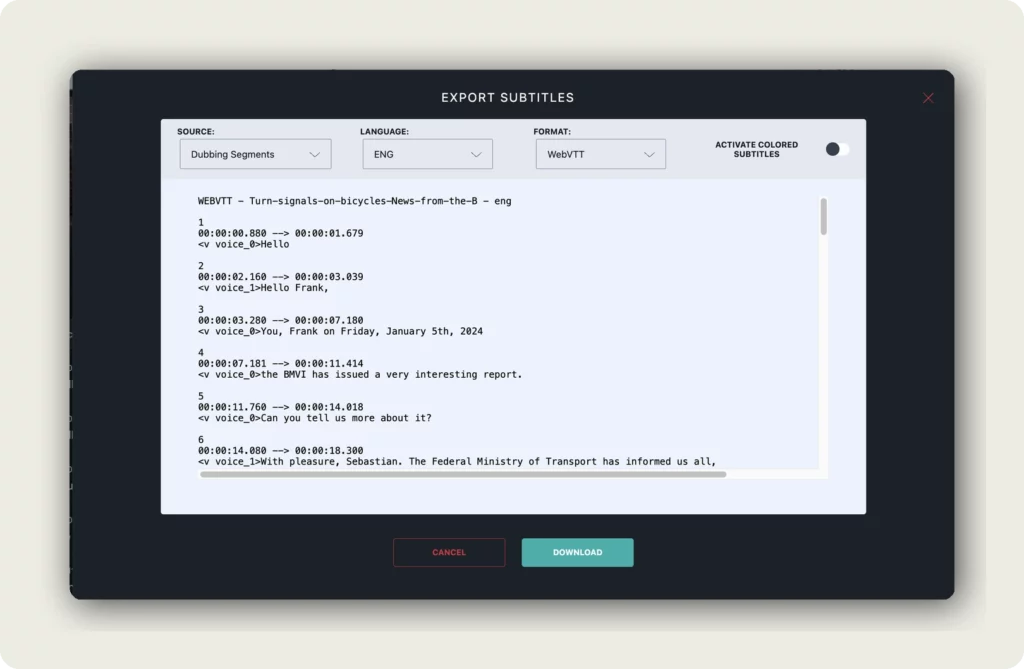
Open the video in the dubbr (My archive → EDIT). In the toolbar click Im-/Export (the up/down arrows icon) and choose Export Subtitles. The EXPORT SUBTITLES dialog opens.
2. Pick the source
Open the SOURCE dropdown to decide which track the export reads from:
- Subtitle Segments — use the dedicated subtitle track (recommended for subtitles).
- Dubbing Segments — use the dub/transcript track. Pick this when you want a transcript file for a language that has no dedicated subtitles yet.
If your project has only a dub and no subtitles, Dubbing Segments is a perfectly good source — you just end up with a subtitle file that matches the transcript timing.
3. Pick the language
Open the LANGUAGE dropdown and choose the language to export — every language on the project is available (for example DEU, ENG, CMN, ZHO, FRA). Export one language at a time.
4. Pick the format
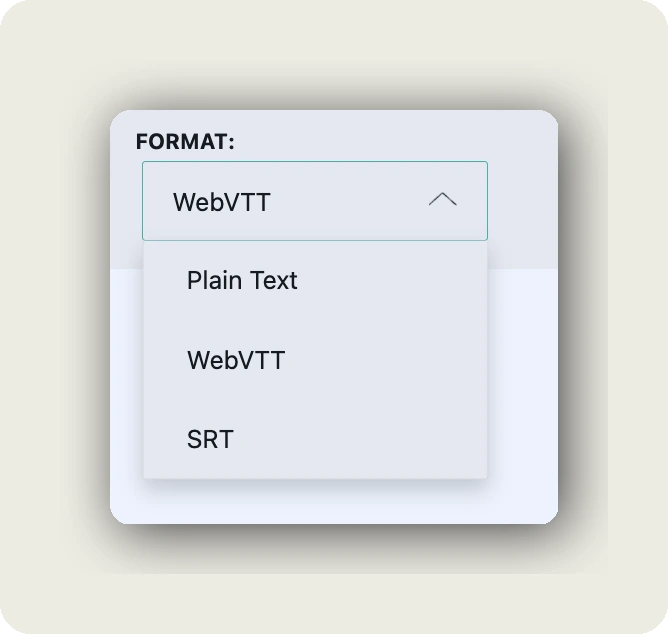
Open the FORMAT dropdown and choose one of three options:
- WebVTT (.vtt) — the web standard for HTML5 video subtitles. Supports styling and voice attribution. Use this for web embeds and most modern players.
- SRT (.srt) — the classic subtitle format. Supported by virtually every player, uploader, and captioning service (including YouTube).
- Plain Text — cues as plain paragraphs, no timestamps. Useful for transcripts, copywriting, or feeding into another tool.
5. (Optional) Enable colored subtitles
For WebVTT exports, the ACTIVATE COLORED SUBTITLES toggle adds a STYLE block that assigns a distinct color per voice. The result looks like this in the file header:
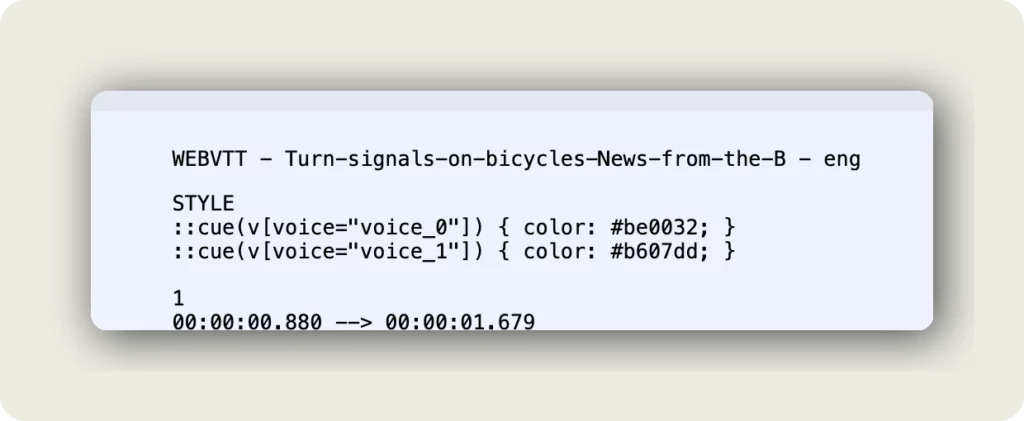
This is useful for multi-speaker videos — viewers can instantly see who is speaking by color. Most web players that understand WebVTT styling will render the colors automatically; simpler players will fall back to plain subtitles with no visible difference.
The toggle is only meaningful for WebVTT — SRT and Plain Text do not support styling and will ignore it.
6. Review the preview, then click DOWNLOAD
The dialog shows a live preview of the file on the right — use it to verify voices, timings, and (for WebVTT with colors) the STYLE block. Scroll through the preview to spot any obviously broken segments before you commit.
When the preview looks right, click DOWNLOAD. The file downloads to your computer with a filename like “Turn-signals-on-bicycles-News-from-the-B – eng.vtt”. Click CANCEL to close the dialog without downloading.
What happens next
You now have a local subtitle file. Repeat the export per language or per source if you need multiple files — there is no bulk export, so one language + one source + one format per download.
Common next steps:
- Upload the .vtt or .srt file to your video host (YouTube, Vimeo, LinkedIn).
- Drop the .vtt next to your HTML5 video as a <track> element.
- Send the plain text version to your editor or localization team.
- Re-import a cleaned-up file via Import Subtitles to round-trip edits back into alugha.
Good to know
- No credits — exports are free. You can export as often as you want.
- Exports are per language and per source. Five languages across both sources = up to ten downloads.
- Use WebVTT for the web and modern players, SRT for YouTube and legacy players, Plain Text for transcripts.
- Colored subtitles only make sense for WebVTT. SRT and Plain Text ignore the toggle.
- The filename is auto-generated from the project title plus a language suffix (for example – eng) and the format extension.
- alugha round-trips cleanly — you can export, edit in another tool, and re-import via Import Subtitles without losing cues.
Troubleshooting
DOWNLOAD is disabled or the preview is empty:
- Check that the selected SOURCE + LANGUAGE combination has any segments. Subtitle Segments + a language with no subtitles gives you nothing — switch the source to Dubbing Segments.
- Confirm the language actually exists on the project. If you added a language but never ran STT or Translation, it will be empty.
Colors do not show in my player:
- Colored subtitles only work with WebVTT + a player that supports WebVTT::cue styling. SRT and Plain Text ignore the toggle by design.
- If the target player does not render colors, the subtitles still display correctly — just without the per-voice coloring.
Timings look off after export:
- Verify the source. Dubbing Segments and Subtitle Segments can have different timings — especially after you edited the subtitle track independently of the dub.
- Use the preview in the export dialog to compare timings against what you see in the dubbr before you download.
I need every language at once:
- There is no bulk export — run Export Subtitles once per language. Open the dialog, change the LANGUAGE dropdown, click DOWNLOAD, repeat.
Related Articles
- Create subtitles from your transcript (Copy Dub to Subs)
- Import subtitles into your project
- Transcribe your video with Speech-To-Text
- Translate your video with Add A New Language
Was this article helpful?